expr:class='"loading" + data:blog.mobileClass'>

Wednesday, 19 October 2011

flashes of inspiration

Grilled Lemon Halloumi


A book review. Flash Food – Laura Santtini

There's a sort of terrible tyranny to the daily chore of making meals for a family. Breakfast, dinner, tea over and over again, day in, day out. Even for those of us who love to cook, it's inevitable that now and again you fall into a rut of using the same ingredients and recreating the same dishes. That's why I held my hand up as a volunteer to 'taste drive' Laura Santtini’s new book 'Flash Cooking' from Quadrille Publishing. I was looking for a bit of inspiration - and I found lots of it here.

This would not be my usual type of book - I like laboring over a stove, things cooking away for hours in the slow oven of the Aga, and the soft bubble of a stock on the back burner. But even I took loads of inspiration from this award-winning writer and I have a list of recipes that I still want to try All of the flavours are categorised geographically and there's lots of room and indeed encouragement to mix things up a little.

The photography in the book is lovely. I was immediately taken with a 'Cauliflower Steak with Harrisa and Feta' which is stand out photograph in the book and it tasted as fantastic as it looked. My fellow IFBA blogger Yvonne, at HeyPesto! did this recipe full justice over at her blog you can read about it there. I will be digging out that recipe when the next vegetarian comes to call and probably way before that as my own 'vegetarian at heart' husband has fallen in love with it. I tried 3 other dishes - a nice variation on your usual chicken wrapped in bacon was the 'Chicken Pockets with Red Pesto and Ricotta'.

Five-Spice Minced Pork with Tenderstem Broccoli

Two great recipes from the book really stood out for me, 'Five-Spice Minced Pork with Tenderstem Broccoli' and another vegetarian recipe,  'Grilled Lemon Halloumi'.

Grilled Lemon Halloumi
2 unwaxed lemons, very thinly sliced
1 garlic clove, crushed
pinch of salt flakes
1 tsp pink peppercorns
2 tbsp olive oil
1 tsp runny honey
1 tbsp small sprigs of fresh dill
250g block of halloumi cheese cut into slices about 1.5cm thick

Preheat the grill to it's hottest. Slice one lemon thinly. Using a pestle and mortar pound the garlic, pinch of salt and the peppercorns - add olive oil, honey and lemon juice from the other lemon. Rub the cheese and lemon slices with the mixture. Place it under the grill and let it color and caramelize (I put mine in the top of the Aga hot oven) Remove and turn over to grill the other side. Serve sprinkled with the dill, remaining dressing and pan juices drizzled over.


This is a lifestyle book with great recipes - much more than a cookbook. It's a 'diet' book that is more about health than weight and manages to stay away from all that neurotic nonsense that many of that genre contains. There is not so much of a whisper of using the sort of ingredients that drive me into a rage - the low fat or sugar free substitutes for 'proper' food, and that has to be applauded.

This book ticks a lot of different boxes. As the name implies, there is nothing that is going to take ages to make, and no special skills are needed. Most recipes, except the entertaining section, feed two people, the majority of the herbs and spices are easily available and have tremendously long self lives. It is really a book of ideas and maybe a jumping off point for a more adventurous style of cooking, and a healthy way to eat as well. 

Overall, with a couple of minor quibbles, I really loved this book, it is fully deserving a place on my crowded cookbook shelves. Of course, needless to mention, if you're looking for something nice and decadent for dessert,  don't look here! 

*Thank you to Mark McGinlay, Quadrille Publishing.

Saturday, 15 October 2011

homemade celery-salt crusted baked potato


I love a baked potato with a salt crust, of all the many ways to enjoy potato it would always be my first choice. And if you make them like this, you will probably love them too.

To get the perfect fluffy baked potato you need a 'floury' spud, the white fleshed sort. Varieties such as King Edward or Maris Piper are perfect for the job. The kind that look like 'Mr. Potato Head' are the ones you are after, and about that size as well. Your oven needs to be between 200 - 220 degrees and a decent sized potato will take at least an hour to cook. Do not wrap a potato in tin foil - they don't like that.

Celery Salt
It's fun to make your own flavored salts and celery salt especially always seems so expensive to buy and to lose its flavour quite quickly once opened! It is easy to make and versatile, use it in place of your usual salt - it is especially nice with fish or egg based dishes. It keeps forever and you can keep topping it up every time a new bunch of celery comes home with you.

Leaves from celery
Flaky sea salt, Maldon is best in this instance

Pick the leaves from each celery stalk, hunt out the little leaves from down the centre also. Leave the stems aside for your usual recipes calling for celery. Put in a single layer on a baking sheet, then toast them in a hot oven for about 5 minutes. Bake until they have dehydrated and gone nice and crispy, but take them out before they have browned. This won't take long so do keep an eye.

Remove from heat and cool completely. Scrunch up the leaves, using your fingers discard any that aren't crispy.

Measure out an equal amount of salt to celery, judging by eye. Put in a jar and stir to mix evenly.

Baked Potatoes
4 (1/2-pound) baking potatoes
1 egg white
Homemade celery salt

Wash and dry potatoes, leave skin on. Prick potatoes all over with a fork. Lightly beat the egg white with a couple of spoons of water in a bowl. Pour your celery salt into another bowl. Roll potato in egg white, then in salt, coating the potato fully. Place on a baking sheet and transfer onto the centre rack in an oven. Bake for approximately 1-2 hrs depending on size. You should be able to pierce your potato all the way through with a knife when done. It should be soft with a crispy skin.

This is just how a baked potato should be.


Friday, 14 October 2011

more midweek meals


Here is another installment in the midweek meal ideas - a couple of great British classics with a twist this time - real fireside suppers for when the weather is getting wild and windy.

'Toad in the Hole' with red onion & balsamic gravy (from Jamie Oliver)

• sunflower oil
• 8 large good-quality sausages
• 4 sprigs of fresh rosemary
• 2 large red onions, peeled and sliced
• 2 cloves of garlic, peeled and finely sliced
• 2 knobs of butter
• 6 tablespoons balsamic vinegar
• 1 level tablespoon
• 1 tbsp good-quality vegetable stock powder 


The batter
• 285ml milk
• 115g plain flour
• a pinch of salt
• 3 eggs

Mix the batter ingredients together, and put to one side. I like the batter to go huge so the key thing is to have an appropriately-sized baking tin (the thinner the better – the oil needs to be very hot).

Cover the bottom of a baking tin with the oil, then place this on the middle shelf of your oven at its highest setting (240–250ºC/475ºF/gas 9). Place a larger tray underneath it to catch any oil that overflows from the tin while cooking. When the oil is very hot, add your sausages. Keep your eye on them and allow them to colour until lightly golden.

At this point, take the tin out of the oven, being very careful, and pour your batter over the sausages. Throw a couple of sprigs of rosemary into the batter. It will bubble and possibly even spit a little, so carefully put the tin back in the oven, and close the door. Don't open it for at least 20 minutes, as Yorkshire puddings can be a bit tempermental when rising. Remove from the oven when golden and crisp.


For the onion gravy, simply fry off your onions and garlic in the butter on a medium heat for about 5 minutes until they go sweet and translucent. Add the balsamic vinegar and allow it to cook down by half. Add the vegetable powder. Sprinkle this in and add a little water. Allow to simmer and you'll have a really tasty onion gravy. Serve with your Toad in the Hole and a mound of mashed potatoes.


Rice Pudding
100g pudding rice
50g sugar
700ml semi-skimmed milk
Can of Nestles Dulce de Leche
Heat oven to 150C. Butter a heatproof baking dish, then tip in the rice and sugar and stir through the milk. Cook for 2 hrs or until the pudding wobbles ever so slightly when shaken.
Layer the rice pudding in serving glasses with Dulce de Leche and top with hazelnut brittle


Hazelnut Brittle
2 oz sugar
75g hazelnuts 

Directions
Roast your hazelnuts and leave them and a baking tray lined with a layer of grease proof paper ready to go close to where you are working with your sugar. Put the sugar in a small saucepan and add 1 tbsp of water. Put on the heat and let the sugar melt. Don't stir it or fuss around with it at this stage. As soon as the big bubbles of sugar disappear it will colour very quickly so be vigilant as can burn in seconds! As soon as the sugar has a nice golden brown tint (and smells candyfloss-ish) take it of the heat, add the hazelnuts and stir through. Spread onto the baking sheet in a thick layer, working  quickly and leave to cool. When cool, chop roughly into chunky shards and use to decorate your puddings.


Tuesday, 11 October 2011

Rainbow Cake

A recipe for Nora...

Rainbow cake for a fairy birthday party

A friend of mine has asked for this recipe which I will duly give.  The photos for this are not amazing but will do for the purpose of explanation.


The easiest way to make a rainbow cake.

Any plain white sponge recipe will do. I used a nice simple victoria sponge. Sponges are best baked 2 at a time and then frozen. When decorating it is a lot easier to put the frosting on a frozen sponge especially because this cake will end up being a lot higher than your average sponge cake. You will need food coloring for your layers (red, yellow, blue) - keep in mind your little rhyme (Richard Of York Gave Battle In Vain) and you can't go wrong. You want the red sponge at the top of the cake - it looks better to have the cooler colors at the bottom.

Sponges

225g/8oz butter at room temperature
225g/8oz caster sugar
4 medium eggs
1 tsp vanilla extract
8oz self raising flour
Milk, to loosen if needed
Preheat the oven to 180C/350F
Grease and line 2 x 18cm/7in cake tins with baking paper.

Cream the butter and the sugar together in a bowl until pale and fluffy.
Beat in the eggs, one at a time, and then the vanilla extract.
Fold in the flour using a large metal spoon, adding a little extra milk if necessary, to create a batter with a soft dropping consistency.

Pour half the mixture in a separate bowl and color as appropriate. Transfer the colored batter to the cake tins and gently spread out with a spatula. Bake for 20-25 minutes, or until golden-brown on top and a skewer inserted into the middle comes out cleanly. Remove from the oven and rest for 5 minutes, then remove from the tin and peel off the paper. When cooled completely, carefully wrap the colored sponge disk in grease proof paper and freeze until ready to decorate. Repeat for the other colors.


Frosting
Ingredients
448g cream cheese (Philly is ideal)
115g butter, softened
250g sifted icing sugar
5ml vanilla extract
(keep extra of all these things in case you run out and need to whip up some more - some people frost cakes with a heavier hand than others)

Directions
In a large bowl, beat together the butter and cream cheese with an electric mixer. 
With the mixer on low speed, add the powdered sugar a bit at a time until smooth and creamy. Beat in the vanilla extract

You can pretty much guess the rest. Decorate it the night before you plan to serve it and it will be defrosted by the morning. Cut into it, reveal the surprise. Say 'Oh it was nothing' as your friends and family gasp. But on the inside be as smug as a smug thing.


Sunday, 9 October 2011

starry, starry nice

"Ah, Mrs. Corry. A story for you.

Your daughters was shorter than you.

But they grew."


My daughter has asked me if she could have some stars to eat - gosh! How fanciful of the child, I thought to myself. Alas, it became clear after a while that it was not a leap of imagination that had made her long for the stars - but those awful frosted 'Lucky Charms' adverts on TV that had done it. 

I find this type of cereal offensive for two reasons - One, there are so many lovely things to have for breakfast… Porridge with your choice of topping, muesli, yoghurt, fruit, a myriad of breads and pastries, eggs a dozen ways, pancakes, beautiful bacon or a nice bit of artisan pudding - why would anyone want a box of cardbord coated in sugar?

The other reason is, of course, that the character on the box is offensive to all Irish people, because none of the leprachauns that live near me look anything like him!


It did remind me, though, of a story I  read as a child 'Mary Poppins'. In the books, Mrs Corry and her two "great galumphing giraffes" of daughters Annie & Fannie, ran a bakery. Mrs Corry had exceptionally long fingers, made of sticks of barley-sugar which she would snap off and hand out as treats to the children who were visiting her shop. They sold pieces of " ... gingerbread so studded with gilt stars that the shop itself seemed to be faintly lit by them." At night and under the cover of darkness, all three Corry's would paste the gingerbread stars into the night sky." I loved that book and must have read it a dozen times. 

So, here is my recipe for gingerbread - stars from the night sky are entirely optional.

Gingerbread Recipe

Ingredients:
100g plain flour
100g wholemeal flour
50g soft brown sugar
50g sultanas 
2 teaspoons ground ginger
1 teaspoon ground cinnamon
1 teaspoon baking soda
A pinch of salt
100g butter 
2 tablespoons golden syrup
2 tablespoons treacle 
1 egg lightly beaten
150ml milk

Method:
Mix together the dry ingredients. Melt the butter with the syrup and treacle and stir into the dry ingredients with the egg and milk. Spoon into a greased and lined 18 cm/7 in cake tin and bake in a preheated oven at 160ºC/325ºF for 1 hour until just springy to touch. Allow to cool a little and turn out to cool completely on a wire rack. This is the old style of ginger cake that will be much improved after keeping wrapped in an airtight container for 3 days to 1 week! Serve warm with custard or with toffee sauce - or go mad and serve with both!


Toffee Sauce

Ingredients:
115g unsalted butter
115g light muscovado sugar
140ml double cream

Method:
Put all the ingredients in a heavy-bottomed saucepan over a low heat until the sugar has dissolved and the sauce has thickened and darkened in colour. 

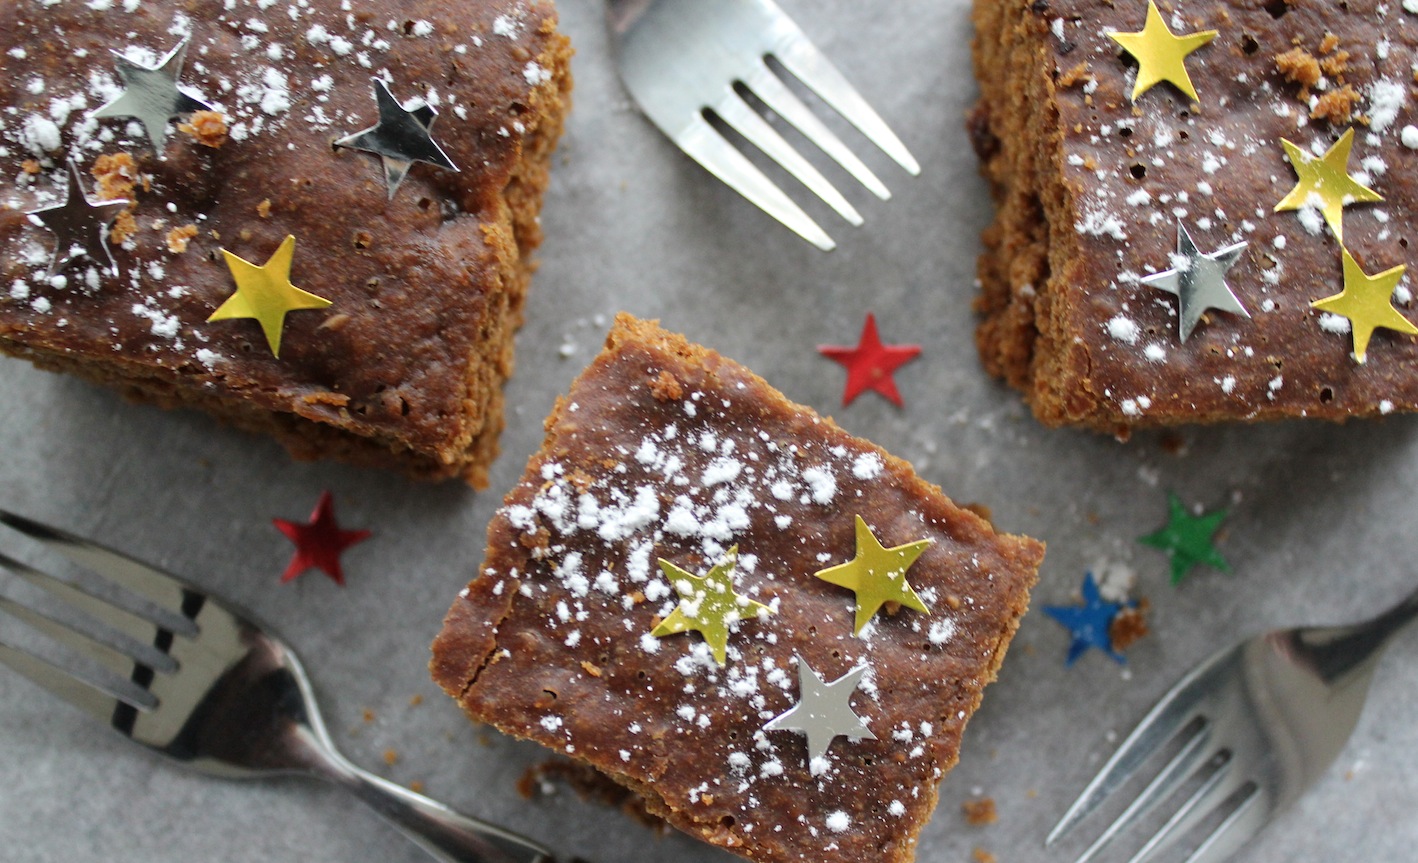
To serve, cut the gingerbread into squares and pour or drizzle over the toffee sauce. Add stars to taste.

Saturday, 8 October 2011

this is how we roll


With all the dried fruit in the shops for those industrious souls making their Christmas cakes, puddings and mincemeat, I could not resist a few bags of dried figs for some of these old favorites. One of the enduring classics of the biscuit world. No mystery to these fig rolls… just great fun to make and delicious to eat.

For the filling:
7 oz dried figs quartered
2 tbsp brown sugar
2 tsp lemon juice
1 tsp cocoa powder (optional, but gives the filling a lovely colour)
½ tsp allspice
pinch of salt

For the dough:
4 oz plain flour
4 oz wholemeal flour
3 oz butter
2 tbsp light muscovado sugar
2 tbsp milk (probably a bit more)
1 large egg yolk
½ tsp vanilla extract
¼ tsp baking powder


Directions:
Put the figs in a heavy-bottomed saucepan over medium heat with 300ml (1/2 pint) water. Simmer for about 20 minutes, stirring occasionally, until the figs are tender and the liquid is well reduced. Add the rest of the ingredients and simmer for 5 mins more until very little liquid remains. Set aside to cool, then puree in a food processor. Let cool completely and refrigerate until set.

Put all the ingredients for the pastry in a food processor and mix, adding more milk a tiny bit at a time until it pulls together as a dough.  Wrap your dough tightly in cling film and refrigerate for at least one hour.

Lightly grease a baking sheet. Pre-heat oven to 175C/350F.

Press the pastry out between two sheets of cling film and roll out to roughly an oblong about (16 x 5 inches). Peel back the top layer of cling film. Spread the fig paste down the centre of the dough rectangle and using the bottom layer of cling film, roll in the sides so that they overlap over the filling.
Trim the ends of the roll, turn the rolls so that the pastry seam is on the bottom and cut into just over one inch wide slices (about 12 fig rolls) and place on the baking sheet.
Bake for 25-30 minutes, until lightly browned. Cool on a rack.

Thursday, 6 October 2011

chocolate chip muffins


Muffins have long been muscled out by their bigger, attention-seeking American cousin, the cupcake (or more recently, the whoopie pie). Having been mostly consigned to garage forecourts, the poor old muffin deserves better than that and still has a lot to offer.

With chocolate chunks studded throughout, these muffins are moist and great with coffee or as a snack. These are lovely just as they are or can be frosted with some extra chocolate. Half of these muffins were decorated with a spoon of brown sugar and a spoon of cocoa powder sprinkled on top before baking. Those ones were for Mama, I don't like my baked goods too sweet! The other half were decorated with a jar of Nutella and a Cadbury's Flake. The more chocolate the better for the junior cook. So easy to do that even a child could decorate them, and in fact - a child did!

If your helper is very young, pop the muffins back into their cooled tin for ease of handling before letting them lose with the chocolate.


Makes 10 

Ingredients:
250g plain flour
100g white sugar
100g dark chocolate, chopped into chunks
15g baking powder
Pinch of salt
150ml milk
50ml sour cream
80ml vegetable oil
1 egg
1 teaspoon of vanilla extract


Directions
Pre-heat oven to 200ºC. Grease and line your muffin tin with muffin cases.
In a medium bowl combine your dry ingredients: flour, sugar, baking powder, chocolate chips, and salt, then mix it well. In a large bowl combine your wet ingredients: milk, sour cream, oil, egg and vanilla, then blend well. Add dry ingredients all at once to the wet mix. Stir until dry ingredients are just moistened (this batter will look lumpy.) Fill the cases to 2/3 full. Bake for 20 to 25 minutes or until skewer inserted in the center comes out clean. Cool for a minute or two before removing from pan.