expr:class='"loading" + data:blog.mobileClass'>
Showing posts with label Preserves. Show all posts

Thursday, 20 September 2012

easy plum sauce


Plum season is upon us and so, here are two plum sauce recipes. This first recipe is a quick version I make with a jar of homemade plum jam. Bought jam or a preserve with a high fruit content would be perfect as well and cherry jam will do in a pinch. The combination of sweet and sour with a touch of heat makes the perfect companion for spring rolls, wontons, tofu, pork, chicken dishes. To be honest, I think if you dipped a stinky tramp's shoe into this it would make it quite palatable, it's just that good. We most often have it with quick midweek supper of crispy duck and pancakes plus a bowl of fluffy steamed rice - just bring everything to the boil together and serve, it is truly delicious. 


Plum Sauce # 1
Ingredients
1 jar plum jam
2 tablespoons vinegar
1 tablespoon brown sugar
1 tablespoon dried minced onion
1 teaspoon crushed red pepper flakes
1 clove garlic, minced
1/2 teaspoon five spice powder

Directions
In a saucepan over medium heat, combine jam, vinegar, brown sugar, dried onion, red pepper, garlic and spice. Bring to a boil, stirring. Remove from heat.


Plum Sauce # 2
Ingredients
1kg plums
1 onion
4 garlic cloves
1cm fresh ginger
1 chilli (optional)
2 star anise
1 cinnamon stick
1/4 tsp five-spice powder
2tsp sea salt
50ml rice wine vinegar
25ml soy sauce

Directions
Stone the plums, chop them into quarters and put them in a saucepan with a tight fitting lid. Finely chop the onion, slice the chilli (if using) in two lengthways and blitz with the garlic and ginger to a puree in a food processor. Add the onion, the garlic and ginger puree, star anise, cinnamon, cloves and salt to the saucepan along with a tiny drop of water and other liquids to cover the bottom of the pan.


Bring to the boil slowly and simmer for 30 to 40 minutes until the plums are rendered to mush. Remove the cinnamon stick and star anise. Blitz to a puree with a hand blender or in a food processor. The sauce should be a nice ketchup-y consistency by now. If not, boil for a little longer. Cool slightly and pour into pre-sterilised bottles, screw lids on firmly and store in a cool, dark  place.

The colour of the finished sauce will depend on the kind of plum you use, but any variety will do. If you have bought a punnet of plums in the supermarket and they are not nice enough to eat by themselves, they will make a good base for this lovely plum sauce.

Monday, 23 April 2012

donut muffins...


These are called doughnut muffins but in truth are not very doughnut-like at all. The sugar coating and spoon of jam in the centre is about as far as it goes. What they do have going for them is no resting or rising is needed and no vats of boiling oil are required. They are very quick to throw together, taste better the day after you make them and keep for four or five days in a sealed container. They also make a very acceptable breakfast muffin and kids just love them.


The original recipe for these little cakes is from BBC Good Food Magazine and lists raspberry preserve, which I love. But some are not keen on the pips, so I used the universal crowd pleaser that is Bonne Maman’s Strawberry preserve instead. Show me someone who doesn't like strawberry jam and I will show you a kitten kicker.


Ingredients
150g caster sugar
200g plain flour
1 tsp baking powder
100ml plain yoghurt (I used regular Glenisk but low-fat works just as well)
2 large eggs
1 tsp vanilla extract
150g butter, melted
12 tsp strawberry preserve
150g caster sugar to coat
Makes 12 muffins

Method
Heat the oven to 180°c and lightly grease a 12-hole muffin tin.
Put the sugar, flour and baking powder in a bowl and mix to combine.
In another bowl, whisk together the yoghurt, eggs and vanilla extract. Pour the wet ingredients and melted butter into the dry ingredients and fold until mixed well.
Place 2 tbsp of the mixture into each muffin hole. Add 1 tsp of the jam into the centre of each and then cover with the rest of the batter.
Place the muffins into the oven and allow to bake for 15-20 minutes until golden brown and cooked through.
Remove from the oven and allow to cool for 5 minutes in the tin before removing and tossing in the caster sugar. Top tip folks - keep them bottom side up after coating as they will hold their sugar crust better.


Wednesday, 15 February 2012

scrummy sausage rolls...


This is a post about sausage rolls and how to make them extra tasty. Before I go any further I feel I must say in my defence, that it is quite difficult to photograph a sausage without it looking a bit rude. That is all.


Has anyone ever found a decent commercially-made sausage roll? Not me anyway. A recipe that calls for only a few ingredients must have the best, and that just never happens with the commercial type. Cheap puff pastry and low grade pork filling just don't cut the mustard (I also like to add mustard).

The sausage itself must be excellent. If you are lucky enough to have a butcher who makes pork sausages, those will do nicely. There are a lot of high quality sausages available now. I recently met the happy pork folk over at Oldfarm, Margaret and Alfie. Margaret told me the story of how 'Pigs happened to her'. How careless to let pigs take over one's home like that, I thought. But how clever of her to convert them to porky delights and sell them to the sausage eaters that haunt Twitter Land. I shall be having some of those for myself soon I hope. But until then I buy the best quality sausages with the highest pork content that I can find.

I prefer to use a whole sausage as the texture is usually better than sausage meat, add some favourite herbs if you like, sage or thyme are always good with pork. The puff pastry you can make yourself if you have nothing for doing, but I usually buy it. A nice tomato based chutney is ideal for the filling, I use one from Rua in Castlebar which is the chutney you would make if you were making some yourself. Mustard, sharp and smooth. Cheese, piquant and melty. All rolled together and baked until puffed up and golden, great for a quick lunch with a little salad and some extra chutney on the side.

The cutting down the middle and filling comes from my mother who had picked up some very strange habits in boarding school, but that is a story for another day.


Ingredients
A packet of ready-made puff pastry (all-butter)
8 - 12 herbed sausages sliced length-way down the centre
Smooth mustard
1oz cheddar cheese
A couple of tablespoons of good quality chutney
1 free-range egg, beaten
Salt and freshly ground black pepper
Small handful of fresh thyme/sage leaves (optional)

Method
Preheat the oven to 200C/400F/Gas 6.

Roll the pastry out (if not the pre-rolled sort) on a floured surface to a rectangle and cut in half lengthways. Paint one side of the pastry with the mustard.

Lay the sausages along both pieces of pastry and season with salt and freshly ground black pepper and sprinkle with herbs. Cut your pastry to best fit your sausages. Spread the chutney and cheese generously into the cut down the centers. Roll the sausage up in the pastry to enclose.

Brush with the beaten egg and bake in the oven for about 30 minutes, leave to cool slightly before snarfing.


Friday, 20 January 2012

marvellous marmalade


You can't flick through a cookery magazine or trawl your favorite food websites at this time of year without hitting upon a few recipes for the seasonal treat that is Seville Orange Marmalade. The Seville orange is incredibly bitter and not at all something that you want to eat in its natural state. But Seville Orange Marmalade is one of the best things that can be spread on toast and an incredibly useful ingredient for stirring into both sweet and savory dishes. This is the time of year for making it as the Seville oranges are only available for a few weeks in and around January. 

If you have no time for making it now, do not panic, Seville oranges freeze very well. So buy them when you see them and pop them in the freezer for making marmalade whenever it suits you during the year. I use Mary Berry’s recipe from 'The Aga Book' where the marmalade is made from frozen oranges brought to the boil and then left over night in the simmering oven*. I love this method as there is less mess and the fruit is far easier to cut up after the peel has softened.

This recipe makes 10lb/5kg, about  10 jars. They make a lovely gift to give to friends, but If you are not as marmalade mad as I am you can, of course, halve the recipe. Use the largest pan you have as the hot liquid bubbles up far higher than you might think and a hot marmalade eruption takes a LOT of cleaning up.


1½kg (3lb) Seville oranges
Juice of 2 lemons
3 kg (6lb) sugar
2 litres (4 pints) water

Method
Put the whole oranges in a large preserving pan and add the lemon juice. Cover with the water and bring to the boil.  Once boiling, place the pan carefully in the simmering oven and leave to simmer until the oranges are tender (2 hours or so for fresh fruit, overnight for frozen). Remove the oranges and leave to cool. Once cool enough to handle, cut them in half and scoop out all the pulp and pips and place these back into the water.  Bring to the boil and boil for 6 minutes.  Strain this liquid into a large bowl through a sieve and, using a spoon, force the pulp, which contains the pectin that will set the marmalade, through the sieve. Pour the liquid back into the preserving pan.

Cut the peel of the oranges as thinly or as thickly as you like your shreds (I like mine thin and seldom) and add these to the liquid, along with the sugar.  Bring the whole lot up to a rolling boil and boil until setting point is reached.  You can test for this with a sugar thermometer (105°c) or have a cold saucer from the freezer ready, allowed a little drop of the jam to cool on this saucer, the surface will wrinkle when pushed with your finger when it is ready.

Allow the marmalade to cool a little and then pour into sterilised jars. To sterilise your jars, wash in warm soapy water and rinse with hot water, then place on a baking tray in the simmering oven for twenty minutes. Alternatively run them through a cycle in the dishwasher and use directly from there.
There are loads of flavors to add to marmalade if you fancy experimenting. Here is a Whisky and Ginger version my fellow blogger Kristin, at Edible Ireland, made using a different method you might be interest be to read also...

*In a conventional oven heat to 120C and simmer unfrozen fruit for two hours, frozen for about an hour longer.


Friday, 16 December 2011

last minute christmas mincemeat...


Even though Christmas is nearly upon us, it's still not too late to make your own mincemeat. If you've never made this before it is one of the simplest things to make, but also very gratifying. There is very little work involved. After some weighing, a little chopping and grating, all you need to do is stir occasionally while your house fills with the smell of Christmas-ness.

My recipe is vegetarian, nut free and best of all, there are no horrible big lumps of candied peel - my own personal idea of Christmas hell! As you are making it yourself you can, of course, put the best of everything in… muscatel raisins, golden sultanas, etc. as they really make a big difference to the finished product.

I use butter in mine, as I prefer the flavor to the traditional suet and it also makes it suitable for vegetarians. It will, however, look a little cloudy in the jar, but that will melt away on heating. I also don't include any nuts, as there are a lot of nut allergies around these days. They can be incorporated in the topping instead for those who really love them, but feel free to add some to your own. About 50g of almonds for this quantity of mincemeat is about right, making sure to toast them first to bring out all of their delicious nutty flavor. You could also use brandy or rum in place of the sherry if that's what you have.  I also use regular salted butter but if you are using unsalted remember to add a pinch of salt to the mixture.


Ingredients
175g/6oz currants
175g/6oz raisins
175g/6oz sultanas
175g/6oz glacé cherries
1 small Bramley or other cooking apple, peeled, cored and finely chopped
125g/4oz butter
225g/8oz light muscovado sugar
1/2 tsp ground cinnamon
1tsp mixed spice
Grated zest of one orange
Grated zest and juice of one lemon
200ml/7floz of good quality sherry.

Weigh out your fruits into a large pan and add in the chopped apple, zests and lemon juice, butter, sugar and spices. Allow to melt together over a low heat, then simmer very gently for about 10 minutes. When the mixture has cooled completely, stir in the sherry. Spoon the mix into sterilized jars, seal, label (with love) and store in a cool place.


This makes four jars of mince meat. Use it to make traditional mince pies to feed the hordes of hungry carol singers calling to your door.

 "But what else can I do with it?" I hear you ask… Well, you can mix up your mince pie toppings with almond meringue piped on instead of a pastry lid. Or try a simple nutty crumble topping piled over. Or festive-up your regular ice-cream with a warm dollop of mix. Or even make a bread and butter pudding with slices of plain white bread or brioche sandwiched together with a generous spread of this as a filling before pouring over your custard and baking as usual. Mmmmm!

And of course, if you pack it into a pretty jar and tie a jaunty bow, they do make lovely homemade Christmas stocking fillers.

Friday, 28 October 2011

picalilli for cheese and sandwiches


Sisters sometimes know you better than you know yourself. They're a source of wisdom and amusement. They're also a source of coats and dresses when they're not guarding their closet. I have just one sister but that's enough for me because my sis is a quality one! 

She asked me not so long ago "What's your favourite food?" I didn't even have to think…"It's cheese! Cheese is my favorite food…I love cheese, all cheese, I do not discriminate against any cheeses! Stinky cheese, blue cheese, crumbly mature sharp melty - goat sheep cow and buffalo - I love them all." 

"Cheese? She blurted. You can't pick cheese! It's too wide a food category - it's like saying meat. That can't be your favorite food."

So I had to think long and hard - which cheese could I say was my favourite of all the cheeses? It was torture, but eventually I came up with a very mature brie as my cheese of choice - although I felt terrible guilt for the endless cheeses I had not picked. Then I asked her what her favorite food was & guess what she said? 

"Sandwiches! Sandwiches are my favourite - love, love, love them."

"You can't pick sandwiches" I howled - that's every food in the world except yogurt! You can put almost anything in a sandwich! "I know she said - that's why I like them so much!"

Sisters...you gotta love 'em!


This is a magical sunshine yellow color and, if you start the salting the night before, takes no time at all to make. It's so much nicer than the jarred version in supermarkets that it may change your opinion on cauliflower forever. This is best left to mellow for a few days before eating and can be kept in the fridge for about 6 months.

1 small cauliflower
200g green beans
1 red pepper diced
1 onion diced
2 tsp salt
250ml white wine vinegar
1 tsp turmeric
1/2 tsp ground ginger
2 tsp mustard seed
150g caster sugar
80g plain flour 
4 tsp mustard powder

Picalilli, on girdled bread with potted duck, like it here


Cut the cauliflower into small florets and the green beans into 1cm lengths. Combine all the veg in a bowl, sprinkle with the salt and leave for 12 hours. Put the veg in a pan with the vinegar, 250ml water the turmeric, ginger and mustard seed (pour off any salty water first and a stainless steel pan is best). Cover, bring to the boil and simmer for 5 mins, no longer really, as you want the cauliflower to keep its crunch. Drain the liquid into a colander set over a bowl, reserving your vegetables. Put the liquid back in the pan with the sugar. Bring to the boil, while stirring to dissolve the sugar. Put the flour and mustard powder into a big bowl adding 75ml of water to make a paste. Pour in the boiling liquid whisking all the while. Return it to the pan stirring on a low heat until it boils. Remove and stir in the vegetables. Allow to cool and spoon into sterilized jars.


Monday, 26 September 2011

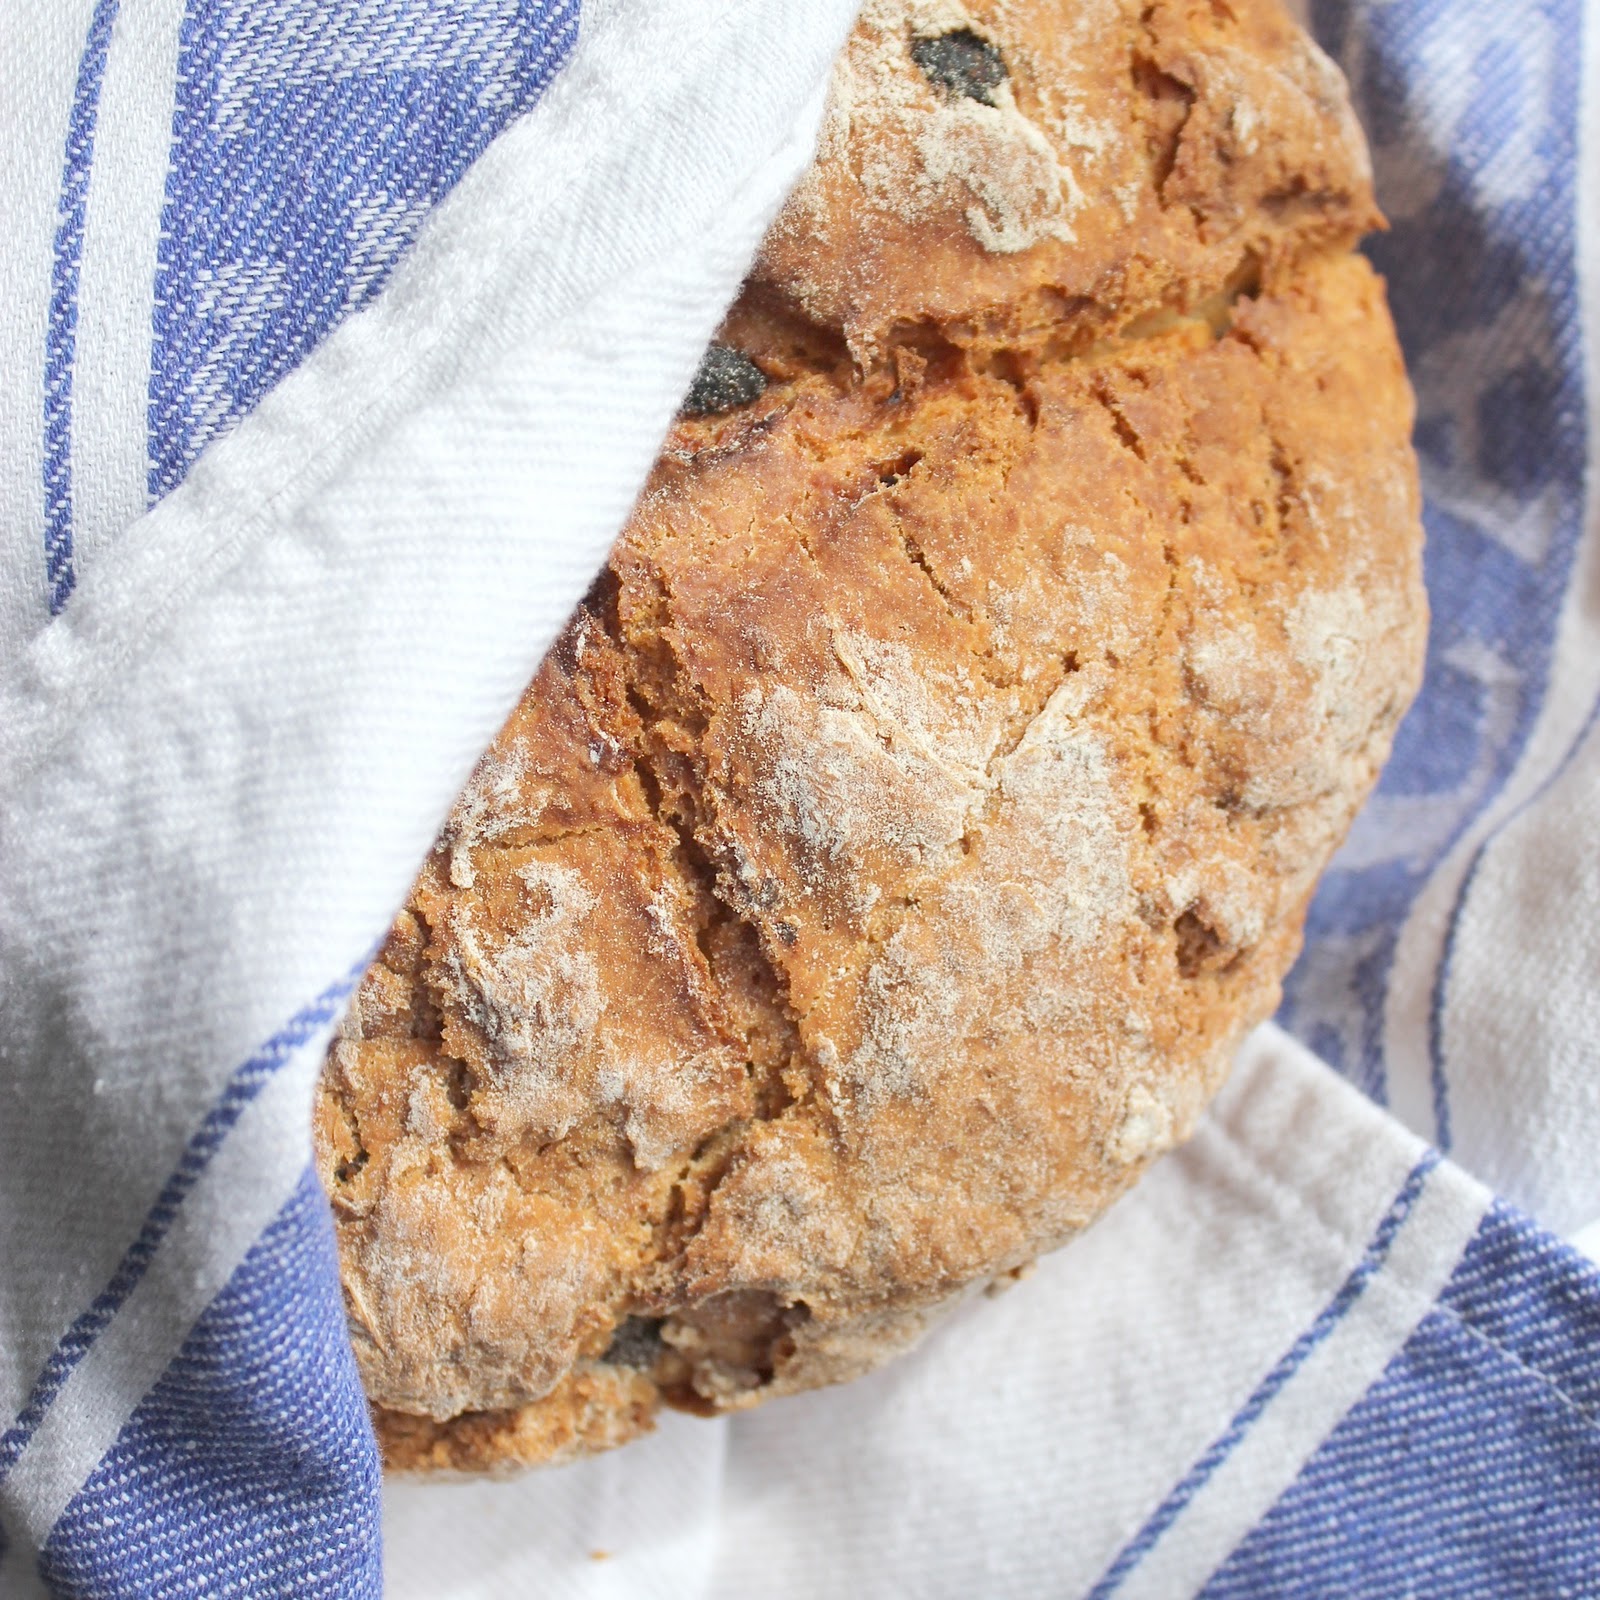
soda bread


My kitchen has been heavy with the smell of boiling fruit and sugar this past week. Damsons, apples and plums from the garden have been processed into jams, jellies, chutneys and preserves in haste. Since the stormy weather has knocked all the ripe fruit from the trees in one fell swoop, the task of preserving for the long winter ahead has to be done in a hurry. These autumnal treasures deserve something special to spread them on and the best thing for this job is the beloved soda bread.

There are a lot of Irish soda bread recipes, but reassuringly, they are all quite similar. The ingredients in a traditional Irish soda bread are flour, baking soda, salt and buttermilk. The brown soda bread is an every day staple, served with soup and other meals or alone but always with lashings of butter. The white soda is the more refined version and often contains a handful of raisins. 


Ingredients
400g plain flour
1 tsp caster sugar
1 tsp bicarbonate of soda
1 tsp salt
350ml buttermilk
2 handfuls of raisins (optional)

Method
1. Preheat the oven to 230C/gas 8. 

2. Sift the dry ingredients into a large bowl and make a well in the centre. Pour in most of the buttermilk (leaving about 60ml in the measuring jug), at this stage add in the raisins if using. Using one hand with your fingers splayed (or two knives), bring the flour and liquid together, adding more buttermilk if necessary. Do not knead the mixture or it will become heavy. The dough should be soft but not too wet and sticky, but with the minimum amount of handling. 

3. When the dough comes together, turn onto a floured work surface and bring together a little more. Pat the dough into a round about 4cm deep and cut a deep cross in the top. 

4. Place the dough onto a baking tray and bake in the oven for 15 minutes, then turn down the heat to 200C/gas 6 and bake for a further 30. When ready, the loaf will be browned and will sound slightly hollow when tapped on the base. 

5. Cool on a wire rack. 


The cuts in the top of the bread are as much a part of Irish culture as the bread itself, in olden times (Ireland being a Catholic country of long standing) the crossing of the breads was traditionally giving thanks and to 'let the devil out of the bread', but the cross on the top is not just ornamental, it is important as it allows the heat to penetrate into the thickest part of the bread, helping it cook evenly. 

It's true that soda bread dries out quickly after slicing, but it makes fantastic toast the next day. An Irish soda bread base is hugely versatile also, great for making flavoured breads, with cheese, herbs, olives, roast cherry tomatoes, red onion or garlic. But I always think it is best eaten freshly-baked and warm or toasted, slathered liberally with butter and smothered in homemade jam, of which I now have plenty.


Sunday, 18 September 2011

an irish hedgerow harvest...


Blackberry Drop Scones

Very easy to make and even easier to eat... Made all the better with free hedgerow blackberries. These beautiful berries are available for a limited time only - so get out there and get picking.

Makes 30 - 40 scones

25g butter, melted
250g plain flour
Pinch of salt
1 tsp Baking powder
25g caster sugar
2 eggs, lightly beaten
Up to 250ml milk

A little sunflower oil for frying

Sift the flour, baking powder and salt into a bowl. Stir in the sugar. Make a well in the centre, pour in the eggs and a little milk, and beat, gradually incorporating the flour. Beat in the melted butter. Slowly add more milk and incorporate the rest of the flour until you have a smooth but thick batter that drops off the spoon.

Heat a heavy-based frying pan over a medium heat until hot. Grease with a smear of oil or butter (or a little of both for a crispy edge). Drop tablespoonfuls of the mixture into the pan, leaving room for them to spread (you'll have to cook them in batches). After a couple of minutes, when they are set and have bubbles on the surface, flip them over and cook for a minute or so more, until the second side has browned. Repeat with the remaining batter, adding a little more butter to the pan as required.

Blackberry Syrup

Put two large handfuls of blackberries (picked over carefully and rinsed gently under a tap) into a small saucepan with two teaspoons of sugar. Bring up to the boil and simmer for a minute or two until all the juice has been released from the berries. Press through a fine sieve to remove the pips and serve poured over your warm drop scones with a couple of whole fruits for garnish and absolutely nothing else.

Thursday, 18 August 2011

bacon jam, the eight wonder of the world...


This intriguing concoction first came to my attention earlier this year. I couldn't wait to find out what it was... a paté, a chutney, potted meat or jelly? But try as I might I could not get my little paws on a jar. I stalked @edhick  (the maker) on Twitter, I badgered stockists, all to no avail. There was nothing left to do but make some. I donned my recipe sleuth hat and trawled the web and historical recipes for information. After extensive research I am pleased to announce that I am now the world's leading authority on 'bacon jam' and I shall be choosing it as my specialist subject on Mastermind. Here's what I did...

Ingredients
500g good quality smoked bacon, diced
A large onion (200g approx.) cut into a rough dice

2 garlic cloves minced

220g brewed coffee (the good stuff, strong)

30g apple cider vinegar 
1 tbsp. worcestershire sauce

30g brown sugar
2 tbsp maple syrup
1 tbsp. cocoa powder 


Cook the bacon over a high heat in a large heavy bottomed pan, stirring occasionally until the fat is rendered and the bacon is lightly browned (approximately 20 minutes). With a slotted spoon, remove the bacon onto a paper towel lined plate and let it drain.

Pour off all but 1 tablespoon of the bacon fat from the pan. Add the onions, and cook until they are translucent. Add the minced garlic, fry until fragrant. Add the vinegar, sugar, maple syrup, worcestershire sauce, cocoa powder and coffee, bring to the boil, stirring and scraping up the bacon bits from the bottom of the pan. After 2 minutes, add the bacon, and stir to combine. Simmer until dark and syrupy (about two hours), adding a couple of tablespoons of water at a time if your mixture starts to look dry.
Let the 'jam' cool, then pulse it in a food processor for 2-3 seconds. It's better to leave some texture to it, preferably a bit rustic with chunks. Then refrigerate in an airtight container. 

It will keep in the refrigerator for up to 4 weeks, but believe me there is no way it will last that long! In fact I wish I had doubled the recipe...

Like chutney, with equal notes of sweet and salty, it's perfect with cheese... 


... and with eggs and all manner of cooked breakfast dishes. You can use it as a condiment on a burger or baked potato, stirred into stews and other slow cooked dishes to give a deeper flavour. It is truly multi-talented and no one can ever have too much 'bacon jam'.

Wednesday, 3 August 2011

apricot coffee cake...


Apricots cannot be trusted. They lie! The sooner I accept this fact of life the sooner I can move on and not spend my summers in a haze of disappointment and regrets. They look so ripe and inviting, but how often do they deliver on their promise?

I still buy them in expectation of this punnet having the perfect apricot. But because I have been fooled so many times I now buy an extra bag of sugar as well, so I can at least make some jam from the punnet of falsehood.

Here is a nice way of using some of the under-sweet apricots that cheat their way into your home. This is a 'Coffee Cake', a rather old fashioned notion of a cake served with a mid-morning cup of coffee, but usually with no actual coffee in it. How quaint! The bottom of the cake is nicely dense, its sweetness works nicely against the tart apricots, and the top of the cake is deliciously moist, from the fruit and the jammy topping. It can also be made with other kinds of tart, not overly juicy fruit, such as halved plums, pink rhubarb chunks or apple slices... It is wonderfully versatile.


Ingredients

190 g plain flour
1/2 tsp salt
1 tsp baking powder
150 g white sugar
1 egg
30 g butter
160 ml buttermilk
1 tsp vanilla extract
310 g pitted and diced fresh apricots
1/2 tsp mixed spice, or to taste
2 tbsp white sugar

Apricot glaze and a drizzle of icing to serve.


Method

Preheat oven to 375 degrees F (190 C). Sift the flour, salt, and baking powder into a large bowl. In a separate bowl, cream together the sugar, egg, and butter until smooth. Stir the buttermilk and vanilla into the batter. Pour the batter into the flour and beat until smooth.

Spread the batter into a greased 8 inch square pan, and sprinkle the diced apricots evenly over the top. Dust with spice and sugar. I made mine in a ring tin because it amuses the children and put the fruit at the bottom of the sponge mixture, it is a very forgiving mixture and will work either way.

Bake in the preheated oven approximately 45 minutes, or until a skewer inserted into the center of the cake comes out clean.


I make a jam from any apricots left over (and the aforementioned extra bag of sugar). Stone the fruit and weigh, then boil with the same quantity of sugar. Sieve the resulting jam and glaze the top of your cake with it. You will most likely have extra apricot jam so pot it up in a sterilised jar and store in the fridge. You can use it to glaze fruit tarts and cupcakes, etc. or just spread on buttery toast or a scone. Drizzle your cake with a little icing sugar mixed with a drop of water or lemon juice and serve.

Tuesday, 21 June 2011

preserving summer...


The abundance of the Wexford strawberry sellers on the sides of the roads mean it's the perfect time to make your own jam if you haven't done so before. These berries certainly don't last as long as the sprayed-to-death 'super-berries' from the supermarkets (in stock all year round, they look like strawberries, smell like strawberries but alas, taste of not very much at all). 

People think there is some mystery to jams, jellies and preserves, but there isn't really. Traditionally jams are made 1:1 proportion fruit to sugar. This means for each kilo of fruit you use a kilo of sugar. My mother never used any preservative except sugar and neither do I. If you want preservatives in your jam, buy it in the supermarket. Just take care to properly sterilise your jars. After that, it's pretty hard to go wrong.

Easy Strawberry Jam

1kg strawberries, hulled & halved
1kg white sugar (or jam sugar - but it's not really necessary)
1 Tablespoon of water
Juice from 1/2 a lemon

Place the fruit and water in a saucepan on a medium heat. Cook for 15 mins until the fruit starts to break down. 

Add the sugar and lemon juice. Bring to the boil then reduce heat and simmer for 10-15 mins. 

Mash any remaining big bits of fruit with a potato masher and skim any foam from the surface.

Carefully pour the hot jam into the prepared jars (see below for perfect jar prep). Seal with the lids and 'Bob's your uncle'! Makes 1 litre or 4 big jars.


Jar Prep (also useful for chutneys & preserves etc.)

This is the easiest way to sterilise jars. Fill your dishwasher with clean cold jars and run a rinse wash. Use the jars one at a time from the dishwasher when needed. 

I prefer to do them in the cool oven of the Aga - another bonus of my kitchen buddy! But, this is how to do it in a regular oven... Heat the oven to 350°F/180°C/Gas 4 - no higher or you risk the glass breaking. Lay a clean tea towel in a large roasting tin. Put the jars and lids in making sure the jars are not touching each other. Close the oven door and sterilise the jars for about 15 minutes. Using thick oven mitts, remove each jar from the oven and fill. Make sure you fill the jar while the jam or preserve is about as hot as the jar. Don't add cold food to hot jars, or hot food to cold jars.

There are all sorts of uses for this fantastic seasonal jam - on a warm buttery scone, oozing out of a classic Victoria sponge or best of all, a hidden away jar kept for a rainy January day when summer seems an eternity away. Hunt out your treasure and spoon a big dollop of it into a bowl of rice pudding, hot from the oven, for a little reminder of summer.